Finding and fixing mistakes#
To err might be human, but to really handle the consequences will take a top-notch revision control system. In this chapter, we’ll discuss some of the techniques you can use when you find that a problem has crept into your project. Mercurial has some highly capable features that will help you to isolate the sources of problems, and to handle them appropriately.
Erasing local history#
The accidental commit#
I have the occasional but persistent problem of typing quicker than I can think,
which sometimes results in me committing a changeset that is either incomplete or
plain wrong. In my case, the usual kind of incomplete changeset is one in which
I’ve created a new source file, but forgotten to hg add it. A “plain wrong”
changeset is not as common, but no less annoying.
Rolling back a transaction#
In Safe operation, I mentioned that Mercurial treats each modification of
a repository as a transaction. Every time you commit a changeset or pull changes
from another repository, Mercurial remembers what you did. You can undo, or roll
back, exactly one of these actions using the hg rollback command. (See
Rolling back is useless once you’ve pushed for an important caveat about the use of this
command.)
Here’s a mistake that I often find myself making: committing a change in which
I’ve created and referenced a new file, but forgotten to hg add it.
Show code cell content
export HGRCPATH=$PWD/../hgrc4book
cd /tmp/tmp_mercurial_book
rm -rf *
hg init a
cd a
echo a > a
hg ci -A -m 'First commit'
echo a >> a
adding a
hg status
echo b > b
hg commit -m 'Add file b'
M a
Looking at the output of hg status after the commit immediately confirms the
error.
hg status
hg tip
? b
changeset: 1:2d4403459087
tag: tip
user: Pierre Augier <pa@example.com>
date: Wed Sep 13 16:14:28 2023 +0000
summary: Add file b
The commit captured the changes to the file a, but not the new file b. If I
were to push this changeset to a repository that I shared with a colleague, the
chances are high that something in a would refer to b, which would not be
present in their repository when they pulled my changes. I would thus become the
object of some indignation.
However, luck is with me—I’ve caught my error before I pushed the changeset. I use
the hg rollback command, and Mercurial makes that last changeset vanish.
hg rollback
hg tip
hg status
abort: rollback is disabled because it is unsafe
(see `hg help -v rollback` for information)
changeset: 1:2d4403459087
tag: tip
user: Pierre Augier <pa@example.com>
date: Wed Sep 13 16:14:28 2023 +0000
summary: Add file b
? b
Notice that the changeset is no longer present in the repository’s history, and
the working directory once again thinks that the file a is modified. The commit
and subsequent rollback have left the working directory exactly as it was prior to
the commit; the changeset has been completely erased. I can now safely hg add
the file b, and rerun my commit.
hg add b
hg commit -m 'Add file b, this time for real'
The erroneous pull#
It’s common practice with Mercurial to maintain separate development branches of a project in different repositories. Your development team might have one shared repository for your project’s “0.9” release, and another, containing different changes, for the “1.0” release.
Given this, you can imagine that the consequences could be messy if you had a local “0.9” repository, and accidentally pulled changes from the shared “1.0” repository into it. At worst, you could be paying insufficient attention, and push those changes into the shared “0.9” tree, confusing your entire team (but don’t worry, we’ll return to this horror scenario later). However, it’s more likely that you’ll notice immediately, because Mercurial will display the URL it’s pulling from, or you will see it pull a suspiciously large number of changes into the repository.
The hg rollback command will work nicely to expunge all of the changesets that
you just pulled. Mercurial groups all changes from one hg pull into a single
transaction, so one hg rollback is all you need to undo this mistake.
Rolling back is useless once you’ve pushed#
The value of the hg rollback command drops to zero once you’ve pushed your
changes to another repository. Rolling back a change makes it disappear entirely,
but only in the repository in which you perform the hg rollback. Because a
rollback eliminates history, there’s no way for the disappearance of a change to
propagate between repositories.
If you’ve pushed a change to another repository—particularly if it’s a shared repository—it has essentially “escaped into the wild,” and you’ll have to recover from your mistake in a different way. If you push a changeset somewhere, then roll it back, then pull from the repository you pushed to, the changeset you thought you’d gotten rid of will simply reappear in your repository.
(If you absolutely know for sure that the change you want to roll back is the most recent change in the repository that you pushed to, and you know that nobody else could have pulled it from that repository, you can roll back the changeset there, too, but you really should not expect this to work reliably. Sooner or later a change really will make it into a repository that you don’t directly control (or have forgotten about), and come back to bite you.)
You can only roll back once#
Mercurial stores exactly one transaction in its transaction log; that transaction is the most recent one that occurred in the repository. This means that you can only roll back one transaction. If you expect to be able to roll back one transaction, then its predecessor, this is not the behavior you will get.
hg rollback
hg rollback
abort: rollback is disabled because it is unsafe
(see `hg help -v rollback` for information)
abort: rollback is disabled because it is unsafe
(see `hg help -v rollback` for information)
Once you’ve rolled back one transaction in a repository, you can’t roll back again in that repository until you perform another commit or pull.
Reverting the mistaken change#
If you make a modification to a file, and decide that you really didn’t want to
change the file at all, and you haven’t yet committed your changes, the
hg revert command is the one you’ll need. It looks at the changeset that’s the
parent of the working directory, and restores the contents of the file to their
state as of that changeset. (That’s a long-winded way of saying that, in the
normal case, it undoes your modifications.)
Let’s illustrate how the hg revert command works with yet another small example.
We’ll begin by modifying a file that Mercurial is already tracking.
cd /tmp/tmp_mercurial_book
rm -rf
hg init a
cd a
echo 'original content' > file
hg ci -Ama
abort: repository a already exists
adding file
cat file
echo unwanted change >> file
hg diff file
original content
diff --git a/file b/file
--- a/file
+++ b/file
@@ -1,1 +1,2 @@
original content
+unwanted change
If we don’t want that change, we can simply hg revert the file.
hg status
hg revert file
cat file
M file
original content
The hg revert command provides us with an extra degree of safety by saving our
modified file with a .orig extension.
hg status
cat file.orig
? file.orig
original content
unwanted change
Tip
It’s extremely unlikely that you are either using Mercurial to manage files with .orig extensions or that you even care about the contents of
such files. Just in case, though, it’s useful to remember that hg revert will unconditionally overwrite an existing file with a .orig
extension. For instance, if you already have a file named foo.orig when you revert foo, the contents of foo.orig will be clobbered.
Here is a summary of the cases that the hg revert command can deal with. We will
describe each of these in more detail in the section that follows.
If you modify a file, it will restore the file to its unmodified state.
If you
hg adda file, it will undo the “added” state of the file, but leave the file itself untouched.If you delete a file without telling Mercurial, it will restore the file to its unmodified contents.
If you use the
hg removecommand to remove a file, it will undo the “removed” state of the file, and restore the file to its unmodified contents.
File management errors#
The hg revert command is useful for more than just modified files. It lets you
reverse the results of all of Mercurial’s file management commands—hg add,
hg remove, and so on.
If you hg add a file, then decide that in fact you don’t want Mercurial to track
it, use hg revert to undo the add. Don’t worry; Mercurial will not modify the
file in any way. It will just “unmark” the file.
echo oops > oops
hg add oops
hg status oops
hg revert oops
hg status
A oops
? file.orig
? oops
Similarly, if you ask Mercurial to hg remove a file, you can use hg revert to
restore it to the contents it had as of the parent of the working directory…
include:: examples/results/daily.revert.remove.lxo
This works just as well for a file that you deleted by hand, without telling Mercurial (recall that in Mercurial terminology, this kind of file is called “missing”).
rm -f file
hg status
hg revert file
ls file
! file
? file.orig
? oops
file
If you revert a hg copy, the copied-to file remains in your working directory
afterwards, untracked. Since a copy doesn’t affect the copied-from file in any
way, Mercurial doesn’t do anything with the copied-from file.
hg copy file new-file
hg revert new-file
hg status
? file.orig
? new-file
? oops
Dealing with committed changes#
Consider a case where you have committed a change a, and another change b on top of it; you then realise that change a was incorrect. Mercurial lets you “back out” an entire changeset automatically, and provides building blocks that let you reverse part of a changeset by hand.
Before you read this section, here’s something to keep in mind: the hg backout
command undoes the effect of a change by adding to your repository’s history,
not by modifying or erasing it. It’s the right tool to use if you’re fixing bugs,
but not if you’re trying to undo some change that has catastrophic consequences.
To deal with those, see Changes that should never have been.
Backing out a changeset#
The hg backout command lets you “undo” the effects of an entire changeset in an
automated fashion. Because Mercurial’s history is immutable, this command does
not get rid of the changeset you want to undo. Instead, it creates a new
changeset that reverses the effect of the to-be-undone changeset.
The operation of the hg backout command is a little intricate, so let’s
illustrate it with some examples. First, we’ll create a repository with some
simple changes.
cd /tmp/tmp_mercurial_book
hg init myrepo
cd myrepo
echo first change >> myfile
hg add myfile
hg commit -m 'first change'
echo second change >> myfile
hg commit -m 'second change'
The hg backout command takes a single changeset ID as its argument; this is the
changeset to back out. Normally, hg backout will drop you into a text editor to
write a commit message, so you can record why you’re backing the change out. In
this example, we provide a commit message on the command line using the -m
option.
Backing out the tip changeset#
We’re going to start by backing out the last changeset we committed.
hg backout -m 'back out second change' tip
cat myfile
reverting myfile
changeset 2:eeb35a882edd backs out changeset 1:c41f45849a2a
first change
You can see that the second line from myfile is no longer present. Taking a look
at the output of hg log gives us an idea of what the hg backout command has
done.
hg log --style compact
2[tip] eeb35a882edd 2023-09-13 16:14 +0000 pa
back out second change
1 c41f45849a2a 2023-09-13 16:14 +0000 pa
second change
0 5954da991cc2 2023-09-13 16:14 +0000 pa
first change
Notice that the new changeset that hg backout has created is a child of the
changeset we backed out. It’s easier to see this in Fig. 2,
which presents a graphical view of the change history. As you can see, the history
is nice and linear.
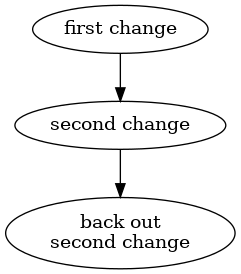
Fig. 2 Backing out a change using the hg backout command#
Backing out a non-tip change#
If you want to back out a change other than the last one you committed, pass the
--merge option to the hg backout command.
cd ..
hg clone -r1 myrepo non-tip-repo
cd non-tip-repo
adding changesets
adding manifests
adding file changes
added 2 changesets with 2 changes to 1 files
new changesets 5954da991cc2:c41f45849a2a
updating to branch default
1 files updated, 0 files merged, 0 files removed, 0 files unresolved
This makes backing out any changeset a “one-shot” operation that’s usually simple and fast.
echo third change >> myfile
hg commit -m 'third change'
# todo: requires user interaction. why?
# hg backout --merge -m 'back out second change' 1
If you take a look at the contents of myfile after the backout finishes, you’ll
see that the first and third changes are present, but not the second.
cat myfile
first change
second change
third change
As the graphical history in Fig. 3 illustrates, Mercurial still commits one change in this kind of situation (the box-shaped node is the ones that Mercurial commits automatically), but the revision graph now looks different. Before Mercurial begins the backout process, it first remembers what the current parent of the working directory is. It then backs out the target changeset, and commits that as a changeset. Finally, it merges back to the previous parent of the working directory, but notice that it does not commit the result of the merge. The repository now contains two heads, and the working directory is in a merge state.
![digraph undo_non_tip {
"first change" -> "second change";
"second change" -> "third change";
backout [label="back out\nsecond change", shape=box];
"second change" -> backout;
merge [label="automated\nmerge", shape=box];
"third change" -> merge;
backout -> merge;
}](../_images/graphviz-0e2f31bcb41aabc04b0a4a028a1f427a8439fb56.png)
Fig. 3 Automated backout of a non-tip change using the hg backout command.#
The result is that you end up “back where you were”, only with some extra history that undoes the effect of the changeset you wanted to back out.
You might wonder why Mercurial does not commit the result of the merge that it performed. The reason lies in Mercurial behaving conservatively: a merge naturally has more scope for error than simply undoing the effect of the tip changeset, so your work will be safest if you first inspect (and test!) the result of the merge, and then commit it.
Always use the --merge option#
In fact, since the --merge option will do the “right thing” whether or not the
changeset you’re backing out is the tip (i.e. it won’t try to merge if it’s
backing out the tip, since there’s no need), you should always use this option
when you run the hg backout command.
Gaining more control of the backout process#
While I’ve recommended that you always use the --merge option when backing out a
change, the hg backout command lets you decide how to merge a backout changeset.
Taking control of the backout process by hand is something you will rarely need to
do, but it can be useful to understand what the hg backout command is doing for
you automatically. To illustrate this, let’s clone our first repository, but omit
the backout change that it contains.
cd ..
hg clone -r1 myrepo newrepo
cd newrepo
adding changesets
adding manifests
adding file changes
added 2 changesets with 2 changes to 1 files
new changesets 5954da991cc2:c41f45849a2a
updating to branch default
1 files updated, 0 files merged, 0 files removed, 0 files unresolved
As with our earlier example, We’ll commit a third changeset, then back out its parent, and see what happens.
echo third change >> myfile
hg commit -m 'third change'
# todo: requires user interaction. why?
# hg backout 1 -m "back out second change"
Our new changeset is again a descendant of the changeset we backed out; it’s thus
a new head, not a descendant of the changeset that was the tip. The hg backout
command was quite explicit in telling us this.
hg log --style compact
2[tip] 1390db35081b 2023-09-13 16:14 +0000 pa
third change
1 c41f45849a2a 2023-09-13 16:14 +0000 pa
second change
0 5954da991cc2 2023-09-13 16:14 +0000 pa
first change
Again, it’s easier to see what has happened by looking at a graph of the revision
history, in Fig. 4. This makes it clear that when we
use hg backout to back out a change other than the tip, Mercurial adds a new
head to the repository (the change it committed is box-shaped).
![digraph undo_manual {
"first change" -> "second change";
"second change" -> "third change";
backout [label="back out\nsecond change", shape=box];
"second change" -> backout;
}](../_images/graphviz-cdbd878d49ec826af079621ef39e77018d5f029a.png)
Fig. 4 Backing out a change using the hg backout command#
After the hg backout command has completed, it leaves the new “backout”
changeset as the parent of the working directory.
hg parents
changeset: 2:1390db35081b
tag: tip
user: Pierre Augier <pa@example.com>
date: Wed Sep 13 16:14:38 2023 +0000
summary: third change
Now we have two isolated sets of changes.
hg heads
changeset: 2:1390db35081b
tag: tip
user: Pierre Augier <pa@example.com>
date: Wed Sep 13 16:14:38 2023 +0000
summary: third change
Let’s think about what we expect to see as the contents of myfile now. The first
change should be present, because we’ve never backed it out. The second change
should be missing, as that’s the change we backed out. Since the history graph
shows the third change as a separate head, we don’t expect to see the third
change present in myfile.
cat myfile
first change
second change
third change
To get the third change back into the file, we just do a normal merge of our two heads.
hg merge
hg commit -m 'merged backout with previous tip'
cat myfile
abort: nothing to merge
nothing changed
first change
second change
third change
Afterwards, the graphical history of our repository looks like Fig. 5.
![digraph undo_manual {
"first change" -> "second change";
"second change" -> "third change";
backout [label="back out\nsecond change", shape=box];
"second change" -> backout;
"third change" -> "manual\nmerge";
backout -> "manual\nmerge";
}](../_images/graphviz-83cffa498853e0bbe600876700cf88b03fa1b896.png)
Fig. 5 Manually merging a backout change#
Why hg backout works as it does#
Here’s a brief description of how the hg backout command works.
It ensures that the working directory is “clean”, i.e. that the output of
hg status -amrdwould be empty.It remembers the current parent of the working directory. Let’s call this changeset
orig.It does the equivalent of an
hg updateto sync the working directory to the changeset you want to back out. Let’s call this changesetbackout.It finds the parent of that changeset. Let’s call that changeset
parent.For each file that the
backoutchangeset affected, it does the equivalent of ahg revert -r parenton that file, to restore it to the contents it had before that changeset was committed.It commits the result as a new changeset. This changeset has
backoutas its parent.If you specify
--mergeon the command line, it merges withorig, and commits the result of the merge.
An alternative way to implement the hg backout command would be to hg export
the to-be-backed-out changeset as a diff, then use the --reverse option to the
patch command to reverse the effect of the change without fiddling with the
working directory. This sounds much simpler, but it would not work nearly as well.
The reason that hg backout does an update, a commit, a merge, and another commit
is to give the merge machinery the best chance to do a good job when dealing with
all the changes between the change you’re backing out and the current tip.
If you’re backing out a changeset that’s 100 revisions back in your project’s
history, the chances that the patch command will be able to apply a reverse diff
cleanly are not good, because intervening changes are likely to have “broken the
context” that patch uses to determine whether it can apply a patch. Also,
Mercurial’s merge machinery will handle files and directories being renamed,
permission changes, and modifications to binary files, none of which patch can
deal with.
Changes that should never have been#
Most of the time, the hg backout command is exactly what you need if you want to
undo the effects of a change. It leaves a permanent record of exactly what you
did, both when committing the original changeset and when you cleaned up after it.
On rare occasions, though, you may find that you’ve committed a change that really should not be present in the repository at all. For example, it would be very unusual, and usually considered a mistake, to commit a software project’s object files as well as its source files. Object files have almost no intrinsic value, and they’re big, so they increase the size of the repository and the amount of time it takes to clone or pull changes.
Before I discuss the options that you have if you commit a “brown paper bag” change (the kind that’s so bad that you want to pull a brown paper bag over your head), let me first discuss some approaches that probably won’t work.
Since Mercurial treats history as cumulative—every change builds on top of all
changes that preceded it—you generally can’t just make disastrous changes
disappear. The one exception is when you’ve just committed a change, and it hasn’t
been pushed or pulled into another repository. That’s when you can safely use the
hg rollback command, as I detailed in Rolling back a transaction.
After you’ve pushed a bad change to another repository, you could still use
hg rollback to make your local copy of the change disappear, but it won’t have
the consequences you want. The change will still be present in the remote
repository, so it will reappear in your local repository the next time you pull.
If a situation like this arises, and you know which repositories your bad change has propagated into, you can try to get rid of the change from every one of those repositories. This is, of course, not a satisfactory solution: if you miss even a single repository while you’re expunging, the change is still “in the wild”, and could propagate further.
If you’ve committed one or more changes after the change that you’d like to see disappear, your options are further reduced. Mercurial doesn’t provide a way to “punch a hole” in history, leaving changesets intact.
Backing out a merge#
Since merges are often complicated, it is not unheard of for a merge to be mangled badly, but committed erroneously. Mercurial provides an important safeguard against bad merges by refusing to commit unresolved files, but human ingenuity guarantees that it is still possible to mess a merge up and commit it.
Given a bad merge that has been committed, usually the best way to approach it is
to simply try to repair the damage by hand. A complete disaster that cannot be
easily fixed up by hand ought to be very rare, but the hg backout command may
help in making the cleanup easier. It offers a --parent option, which lets you
specify which parent to revert to when backing out a merge.
![digraph bad_merge_1 {
ancestor [label="1: ancestor"];
left [label="2: my change"];
right [label="3: your change"];
bad [label="4: bad merge"];
new [label="5: new change"];
ancestor -> left;
ancestor -> right;
left -> bad;
right -> bad;
bad -> new;
}](../_images/graphviz-477dbaf580bc09c6a622d6122848624e335686bd.png)
Fig. 6 A bad merge.#
Suppose we have a revision graph like that in Fig. 6. What we’d like is to redo the merge of revisions 2 and 3.
One way to do so would be as follows.
Call
hg backout --rev=4 --parent=2. This tellshg backoutto back out revision 4, which is the bad merge, and to when deciding which revision to prefer, to choose parent 2, one of the parents of the merge. The effect can be seen in Fig. 7.![digraph bad_merge_2 {
ancestor [label="1: ancestor",color=grey,fontcolor=grey];
left [label="2: my change",color=grey,fontcolor=grey];
right [label="3: your change",color=grey,fontcolor=grey];
bad [label="4: bad merge",color=grey,fontcolor=grey];
new [label="5: new change",color=grey,fontcolor=grey];
bak_left [label="6: backout 1 of\nbad merge",shape=box];
ancestor -> left [color=grey];
ancestor -> right [color=grey];
left -> bad [color=grey];
right -> bad [color=grey];
bad -> new [color=grey];
bad -> bak_left;
left -> bak_left [style=dotted,label="--parent=2"];
}](../_images/graphviz-2f859df775d74486e6ec4f437958bd793b96ef39.png)
Fig. 7 Backing out the merge, favoring one parent.#
Call
hg backout --rev=4 --parent=3. This tellshg backoutto back out revision 4 again, but this time to choose parent 3, the other parent of the merge. The result is visible in Fig. 8, in which the repository now contains three heads.![digraph bad_merge_3 {
ancestor [label="1: ancestor",color="#bbbbbb",fontcolor="#bbbbbb"];
left [label="2: my change",color="#bbbbbb",fontcolor="#bbbbbb"];
right [label="3: your change",color="#bbbbbb",fontcolor="#bbbbbb"];
bad [label="4: bad merge",color="#bbbbbb",fontcolor="#bbbbbb"];
new [label="5: new change",color="#bbbbbb",fontcolor="#bbbbbb"];
bak_left [label="6: backout 1 of\nbad merge",color=grey,shape=box];
bak_right [label="8: backout 2 of\nbad merge",shape=box];
ancestor -> left [color="#bbbbbb"];
ancestor -> right [color="#bbbbbb"];
left -> bad [color="#bbbbbb"];
right -> bad [color="#bbbbbb"];
bad -> new [color="#bbbbbb"];
bad -> bak_left [color=grey];
left -> bak_left [style=dotted,label="--parent=2",color=grey,fontcolor=grey];
bad -> bak_right;
right -> bak_right [style=dotted,label="--parent=3"];
}](../_images/graphviz-ed34bd8e825fdc2e8456062cf2651f8007f68bec.png)
Fig. 8 Backing out the merge, favoring the other parent.#
Redo the bad merge by merging the two backout heads, which reduces the number of heads in the repository to two, as can be seen in Fig. 9.
![digraph bad_merge_4 {
ancestor [label="1: ancestor",color="#bbbbbb",fontcolor="#bbbbbb"];
left [label="2: my change",color="#bbbbbb",fontcolor="#bbbbbb"];
right [label="3: your change",color="#bbbbbb",fontcolor="#bbbbbb"];
bad [label="4: bad merge",color="#bbbbbb",fontcolor="#bbbbbb"];
new [label="5: new change",color="#bbbbbb",fontcolor="#bbbbbb"];
bak_left [label="6: backout 1 of\nbad merge",color=grey,fontcolor=grey,shape=box];
bak_right [label="7: backout 2 of\nbad merge",color=grey,fontcolor=grey,shape=box];
good [label="8: merge\nof backouts",shape=box];
ancestor -> left [color="#bbbbbb"];
ancestor -> right [color="#bbbbbb"];
left -> bad [color="#bbbbbb"];
right -> bad [color="#bbbbbb"];
bad -> new [color="#bbbbbb"];
bad -> bak_left [color=grey];
left -> bak_left [style=dotted,label="--parent=2",color=grey,fontcolor=grey];
bad -> bak_right [color=grey];
right -> bak_right [style=dotted,label="--parent=3",color=grey,fontcolor=grey];
bak_left -> good;
bak_right -> good;
}](../_images/graphviz-85f61ba37c201aa6388b06f00381c9aca8b346a0.png)
Fig. 9 Merging the backouts.#
Merge with the commit that was made after the bad merge, as shown in Fig. 10.
![digraph bad_merge_5 {
ancestor [label="1: ancestor",color="#bbbbbb",fontcolor="#bbbbbb"];
left [label="2: my change",color="#bbbbbb",fontcolor="#bbbbbb"];
right [label="3: your change",color="#bbbbbb",fontcolor="#bbbbbb"];
bad [label="4: bad merge",color="#bbbbbb",fontcolor="#bbbbbb"];
new [label="5: new change",color=grey,fontcolor=grey];
bak_left [label="6: backout 1 of\nbad merge",color="#bbbbbb",fontcolor="#bbbbbb",shape=box];
bak_right [label="7: backout 2 of\nbad merge",color="#bbbbbb",fontcolor="#bbbbbb",shape=box];
good [label="8: merge\nof backouts",color=grey,fontcolor=grey,shape=box];
last [label="9: merge with\nnew change",shape=box];
ancestor -> left [color="#bbbbbb"];
ancestor -> right [color="#bbbbbb"];
left -> bad [color="#bbbbbb"];
right -> bad [color="#bbbbbb"];
bad -> new [color="#bbbbbb"];
bad -> bak_left [color="#bbbbbb"];
left -> bak_left [style=dotted,label="--parent=2",color="#bbbbbb",fontcolor="#bbbbbb"];
bad -> bak_right [color="#bbbbbb"];
right -> bak_right [style=dotted,label="--parent=3",color="#bbbbbb",fontcolor="#bbbbbb"];
bak_left -> good [color=grey];
bak_right -> good [color=grey];
good -> last;
new -> last;
}](../_images/graphviz-d32d6b32caf541a7c6f7dfdf4b3425d8eea59945.png)
Fig. 10 Merging the backouts.#
Protect yourself from “escaped” changes#
If you’ve committed some changes to your local repository and they’ve been pushed or pulled somewhere else, this isn’t necessarily a disaster. You can protect yourself ahead of time against some classes of bad changeset. This is particularly easy if your team usually pulls changes from a central repository.
By configuring some hooks on that repository to validate incoming changesets (see chapter Handling repository events with hooks), you can automatically prevent some kinds of bad changesets from being pushed to the central repository at all. With such a configuration in place, some kinds of bad changesets will naturally tend to “die out” because they can’t propagate into the central repository. Better yet, this happens without any need for explicit intervention.
For instance, an incoming change hook that verifies that a changeset will actually compile can prevent people from inadvertently “breaking the build”.
What to do about sensitive changes that escape#
Even a carefully run project can suffer an unfortunate event such as the committing and uncontrolled propagation of a file that contains important passwords.
If something like this happens to you, and the information that gets accidentally propagated is truly sensitive, your first step should be to mitigate the effect of the leak without trying to control the leak itself. If you are not 100% certain that you know exactly who could have seen the changes, you should immediately change passwords, cancel credit cards, or find some other way to make sure that the information that has leaked is no longer useful. In other words, assume that the change has propagated far and wide, and that there’s nothing more you can do.
You might hope that there would be mechanisms you could use to either figure out who has seen a change or to erase the change permanently everywhere, but there are good reasons why these are not possible.
Mercurial does not provide an audit trail of who has pulled changes from a repository, because it is usually either impossible to record such information or trivial to spoof it. In a multi-user or networked environment, you should thus be extremely skeptical of yourself if you think that you have identified every place to which a sensitive changeset has propagated. Don’t forget that people can and will send bundles by email, have their backup software save data offsite, carry repositories on USB sticks, and find other completely innocent ways to confound your attempts to track down every copy of a problematic change.
Mercurial also does not provide a way to make a file or changeset completely disappear from history, because there is no way to enforce its disappearance; someone could easily modify their copy of Mercurial to ignore such directives. In addition, even if Mercurial provided such a capability, someone who simply hadn’t pulled a “make this file disappear” changeset wouldn’t be affected by it, nor would web crawlers visiting at the wrong time, disk backups, or other mechanisms. Indeed, no distributed revision control system can make data reliably vanish. Providing the illusion of such control could easily give a false sense of security, and be worse than not providing it at all.
Finding the source of a bug#
While it’s all very well to be able to back out a changeset that introduced a bug,
this requires that you know which changeset to back out. Mercurial provides an
invaluable command, called hg bisect, that helps you to automate this process
and accomplish it very efficiently.
The idea behind the hg bisect command is that a changeset has introduced some
change of behavior that you can identify with a simple pass/fail test. You don’t
know which piece of code introduced the change, but you know how to test for the
presence of the bug. The hg bisect command uses your test to direct its search
for the changeset that introduced the code that caused the bug.
Here are a few scenarios to help you understand how you might apply this command.
The most recent version of your software has a bug that you remember wasn’t present a few weeks ago, but you don’t know when it was introduced. Here, your binary test checks for the presence of that bug.
You fixed a bug in a rush, and now it’s time to close the entry in your team’s bug database. The bug database requires a changeset ID when you close an entry, but you don’t remember which changeset you fixed the bug in. Once again, your binary test checks for the presence of the bug.
Your software works correctly, but runs 15% slower than the last time you measured it. You want to know which changeset introduced the performance regression. In this case, your binary test measures the performance of your software, to see whether it’s “fast” or “slow”.
The sizes of the components of your project that you ship exploded recently, and you suspect that something changed in the way you build your project.
From these examples, it should be clear that the hg bisect command is not useful
only for finding the sources of bugs. You can use it to find any “emergent
property” of a repository (anything that you can’t find from a simple text search
of the files in the tree) for which you can write a binary test.
We’ll introduce a little bit of terminology here, just to make it clear which
parts of the search process are your responsibility, and which are Mercurial’s. A
test is something that you run when hg bisect chooses a changeset. A probe
is what hg bisect runs to tell whether a revision is good. Finally, we’ll use
the word “bisect”, as both a noun and a verb, to stand in for the phrase “search
using the hg bisect command”.
One simple way to automate the searching process would be simply to probe every changeset. However, this scales poorly. If it took ten minutes to test a single changeset, and you had 10,000 changesets in your repository, the exhaustive approach would take on average 35 days to find the changeset that introduced a bug. Even if you knew that the bug was introduced by one of the last 500 changesets, and limited your search to those, you’d still be looking at over 40 hours to find the changeset that introduced your bug.
What the hg bisect command does is use its knowledge of the “shape” of your
project’s revision history to perform a search in time proportional to the
logarithm of the number of changesets to check (the kind of search it performs
is called a dichotomic search). With this approach, searching through 10,000
changesets will take less than three hours, even at ten minutes per test (the
search will require about 14 tests). Limit your search to the last hundred
changesets, and it will take only about an hour (roughly seven tests).
The hg bisect command is aware of the “branchy” nature of a Mercurial project’s
revision history, so it has no problems dealing with branches, merges, or multiple
heads in a repository. It can prune entire branches of history with a single
probe, which is how it operates so efficiently.
Using the hg bisect command#
Now let’s create a repository, so that we can try out the hg bisect command in
isolation.
cd /tmp/tmp_mercurial_book
hg init mybug
cd mybug
We’ll simulate a project that has a bug in it in a simple-minded way: create trivial changes in a loop, and nominate one specific change that will have the “bug”. This loop creates 35 changesets, each adding a single file to the repository. We’ll represent our “bug” with a file that contains the text “i have a gub”.
cat > commitbuggy.sh << EOF
#!/bin/bash
buggy_change=22
for (( i = 0; i < 35; i++ )); do
if [[ "\$i" -eq "\$buggy_change" ]]; then
echo 'i have a gub' > "myfile\$i"
hg commit -q -A -m 'buggy changeset'
else
echo 'nothing to see here, move along' > "myfile\$i"
hg commit -q -A -m 'normal changeset'
fi
done
EOF
chmod +x commitbuggy.sh
./commitbuggy.sh
The next thing that we’d like to do is figure out how to use the hg bisect
command. We can use Mercurial’s normal built-in help mechanism for this.
hg help bisect
hg bisect [-gbsr] [-U] [-c CMD] [REV]
subdivision search of changesets
This command helps to find changesets which introduce problems. To use,
mark the earliest changeset you know exhibits the problem as bad, then
mark the latest changeset which is free from the problem as good. Bisect
will update your working directory to a revision for testing (unless the
-U/--noupdate option is specified). Once you have performed tests, mark
the working directory as good or bad, and bisect will either update to
another candidate changeset or announce that it has found the bad
revision.
As a shortcut, you can also use the revision argument to mark a revision
as good or bad without checking it out first.
If you supply a command, it will be used for automatic bisection. The
environment variable HG_NODE will contain the ID of the changeset being
tested. The exit status of the command will be used to mark revisions as
good or bad: status 0 means good, 125 means to skip the revision, 127
(command not found) will abort the bisection, and any other non-zero exit
status means the revision is bad.
Returns 0 on success.
options:
-r --reset reset bisect state
-g --good mark changeset good
-b --bad mark changeset bad
-s --skip skip testing changeset
-e --extend extend the bisect range
-c --command CMD use command to check changeset state
-U --noupdate do not update to target
(some details hidden, use --verbose to show complete help)
The hg bisect command works in steps. Each step proceeds as follows.
You run your binary test.
If the test succeeded, you tell
hg bisectby running thehg bisect --goodcommand.If it failed, run the
hg bisect --badcommand.
The command uses your information to decide which changeset to test next.
It updates the working directory to that changeset, and the process begins again.
The process ends when hg bisect identifies a unique changeset that marks the
point where your test transitioned from “succeeding” to “failing”.
To start the search, we must run the hg bisect --reset command.
hg bisect --reset
In our case, the binary test we use is simple: we check to see if any file in the repository contains the string “i have a gub”. If it does, this changeset contains the change that “caused the bug”. By convention, a changeset that has the property we’re searching for is “bad”, while one that doesn’t is “good”.
Most of the time, the revision to which the working directory is synced (usually the tip) already exhibits the problem introduced by the buggy change, so we’ll mark it as “bad”.
hg bisect --bad
Our next task is to nominate a changeset that we know doesn’t have the bug; the
hg bisect command will “bracket” its search between the first pair of good and
bad changesets. In our case, we know that revision 10 didn’t have the bug. (I’ll
have more words about choosing the first “good” changeset later.)
hg bisect --good 10
Testing changeset 22:0975e817fff5 "buggy changeset" (24 changesets remaining, ~4 tests)
0 files updated, 0 files merged, 12 files removed, 0 files unresolved
Notice that this command printed some output.
It told us how many changesets it must consider before it can identify the one that introduced the bug, and how many tests that will require.
It updated the working directory to the next changeset to test, and told us which changeset it’s testing.
We now run our test in the working directory. We use the grep command to see if
our “bad” file is present in the working directory. If it is, this revision is
bad; if not, this revision is good… include::
examples/results/bisect.search.step1.lxo
This test looks like a perfect candidate for automation, so let’s turn it into a shell function.
cat > mytest << EOF
#!/bin/bash
if grep -q 'i have a gub' *
then
  result=bad
else
  result=good
fi
echo "this revision is \$result"
hg bisect "--\$result"
EOF
chmod +x mytest
We can now run an entire test step with a single command, mytest.
./mytest
this revision is bad
Testing changeset 16:5d87eb65b2ff "normal changeset" (12 changesets remaining, ~3 tests)
0 files updated, 0 files merged, 6 files removed, 0 files unresolved
A few more invocations of our canned test step command, and we’re done.
./mytest
./mytest
./mytest
this revision is bad
Testing changeset 13:b7db049f4271 "normal changeset" (6 changesets remaining, ~2 tests)
0 files updated, 0 files merged, 3 files removed, 0 files unresolved
this revision is bad
Testing changeset 11:9b4d56f4bdbe "normal changeset" (3 changesets remaining, ~1 tests)
0 files updated, 0 files merged, 2 files removed, 0 files unresolved
this revision is bad
The first bad revision is:
changeset:   11:9b4d56f4bdbe
user:        Pierre Augier <pa@example.com>
date:        Wed Sep 13 16:14:44 2023 +0000
summary:     normal changeset
Even though we had 40 changesets to search through, the hg bisect command let us
find the changeset that introduced our “bug” with only five tests. Because the
number of tests that the hg bisect command performs grows logarithmically with
the number of changesets to search, the advantage that it has over the “brute
force” search approach increases with every changeset you add.
Cleaning up after your search#
When you’re finished using the hg bisect command in a repository, you can use
the hg bisect --reset command to drop the information it was using to drive your
search. The command doesn’t use much space, so it doesn’t matter if you forget to
run this command. However, hg bisect won’t let you start a new search in that
repository until you do a hg bisect --reset.
hg bisect --reset